Okay, what do terracotta pots, chalkboard paint,
and herbs have in common?
ABSOLUTELY NOTHING,
Unless you are creating something FABULOUS for your garden!

HELLO GORGEOUS!
Since we moved into our house in 2006, I planted herbs in different types of pots on the deck. The herb pots always provide me with fresh herbs throughout the season. We also have a huge vegetable garden but it isn't always feasible to trek out to the garden (it's at the back of our property) just to snip a bit of basil for dinner. The only problem I had was that I hated the pots I planted the herbs in and I always stuck the tag in the pot to remember which herb is which. Definitely not the best looking herb garden. So after doing a little blog surfing (well... maybe a lot) I spotted pots painted with chalkboard paint. Let me just tell you this... I am in love with these pots and chalkboard paint. SUPER FUN!
Well to keep things just a little bit messy around here, I decided to tackle this project and provide you with a tutorial so you can create your very own herb garden. But first...let me whet your appetite!


Supplies:

Terracotta pots
Chalkboard paint
Frog Tape
Paint brush
Newspaper to protect your surface
Step #1:

Tape the top rim of your pot with the Frog tape.
Make sure you smooth out any bumps or you will
end up with some paint where you don't want it.
(I kinda forgot to do this step and kinda ended up with a big mess but I learned from my mistake and will show you how to fix it.)
Step #2:

Mix your paint well and paint your pots trying to
make it as smooth as possible. Let dry for a couple of hours.
Step #3:
Paint your pots with a second coat and let dry for a couple of hours.
Step #4:

Remove the tape and GASP! loudly when you notice the paint on the rim of the pot.
Step #5:
Take a deep breath and then find some fine grit sandpaper. Lightly sand the end of your pot until all the extra paint has been removed. Then wash the dust off your pot and let dry.
Your pots will go from
 |
| "Oh no!" |

to "Oh yes!"


Look how fabulous they look all cleaned up!
Step #6:
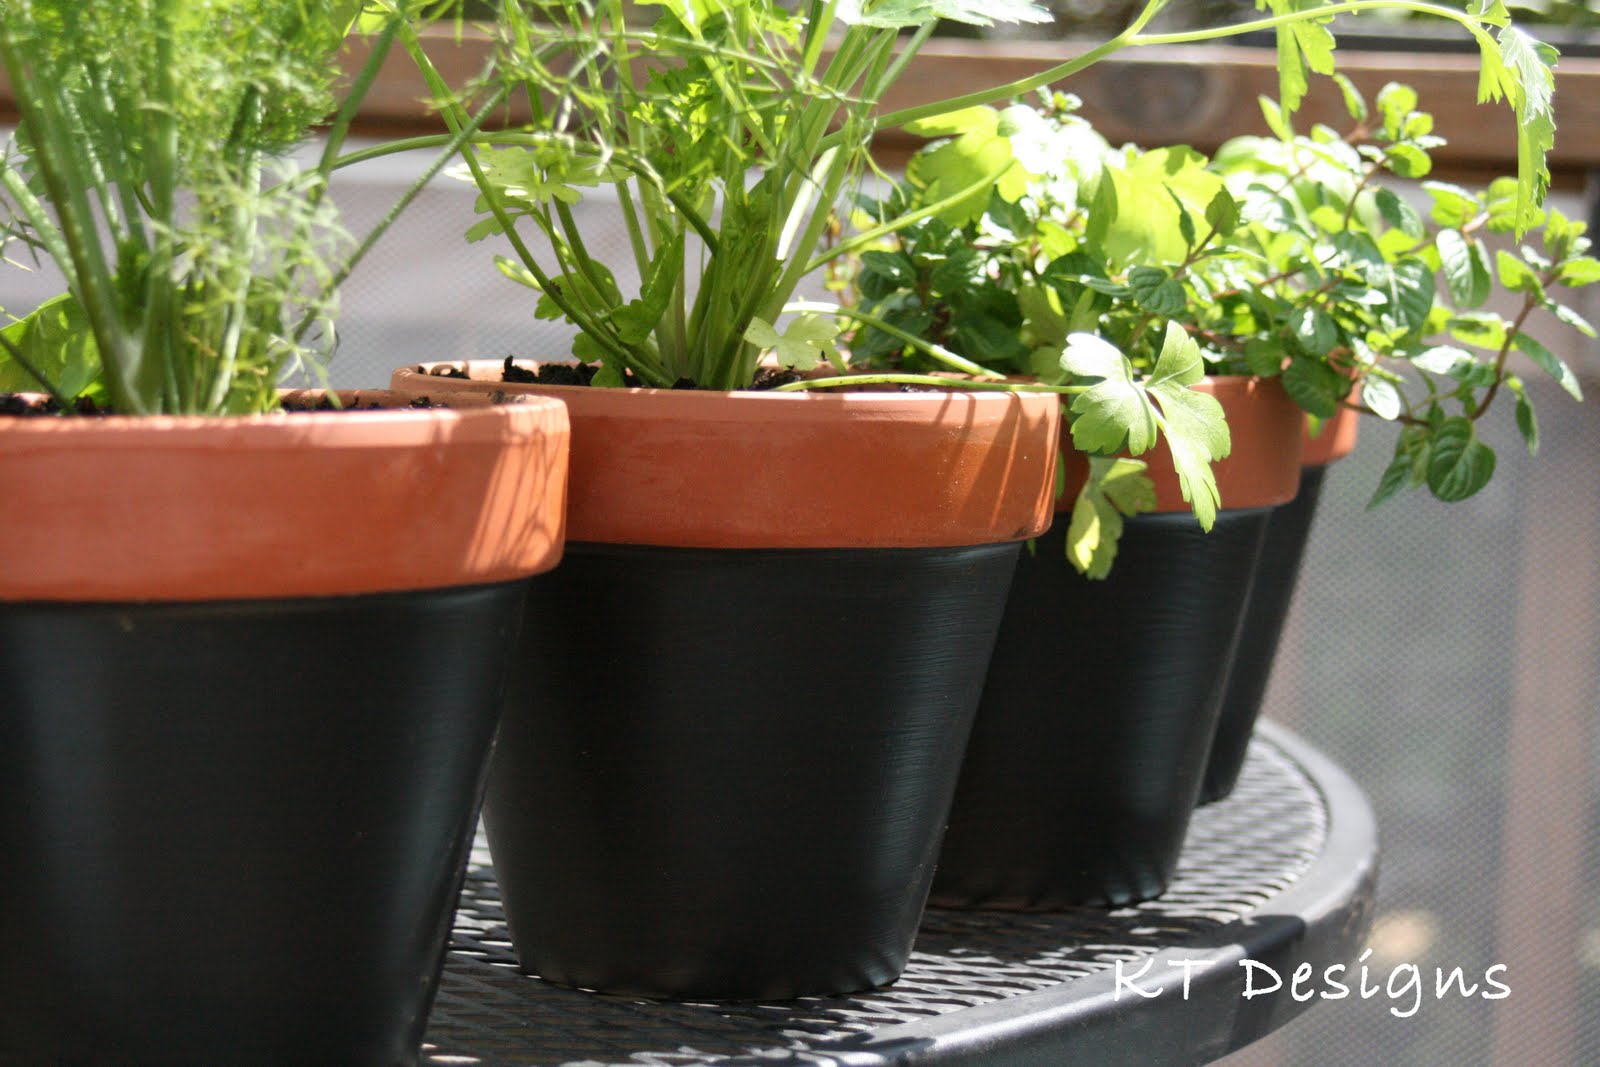


Fill the pot with potting soil and add your herbs.
Step #7:


Now the fun part! Steal (I mean borrow) your son's sidewalk chalk and write the names of the herbs on the side of the pot. I am still looking for those smudge proof chalk markers but I haven't found them yet. The best part about chalk, is if you make a mistake or you have different herbs each year, just take a wet cloth and erase the words then write the new ones in.
I am extremely happy with the way the pots turned out and can't wait to add the herbs to my cooking. I also want to add some twine around the top part of the pot and buy a tray I found at HomeGoods to hold all the pots. If I end up changing things up I will definitely take some pictures to show you.
Now it's your turn to shine!
Have you used chalkboard paint in your
garden this year?
Leave a comment and if I get at least five different ideas I will post a {Friday Favorite} Chalkboard Paint edition.
I would love to feature your work :)
garden this year?
Leave a comment and if I get at least five different ideas I will post a {Friday Favorite} Chalkboard Paint edition.
I would love to feature your work :)
~Katania
Very cute! I'm going to try this for the end of school year gifts.
ReplyDeleteThanks.
Marie
Cute! I've seen these before, but I've never seen anyone leave the rim unpainted. I like it so much more! Totally going to make these :)
ReplyDeletesent you some link love today!
ReplyDeletehttp://www.themombot.com/link-love/2011/05/20/friday-link-love
Very clever! I'm going to feature your tutorial on my blog today. Thank you for sharing your creative talents with us!
ReplyDeleteCheers!
Sarah M.
diyordont.blogspot.com
This is an old teacher's trick. Soak a piece of chalk in a strong sugar solution and let dry (almost.) The chalk will resist erasure. To remove, just use water
ReplyDeleteCute! I've seen these before
ReplyDelete