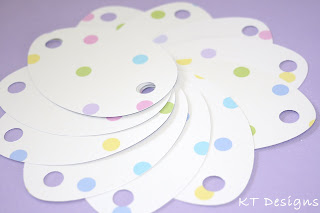
I am sure you have all seen the pencil toppers you can buy from any teacher supply store or Oriental Trading, especially around Valentine's Day. Yeah, they are kinda pricey and not really that cute! So I figured I could create them myself. I actually created Valentine pencil toppers for my students this year but was unable to share them with you since I only just started this blog :) So you get to see my Easter version. Just let me tell you how much my students loved these. Also not only are they getting a new pencil, it looks so darn cute as well!
HERE'S THE TUTORIAL!!!
I will be including information so you can copy my design using your gypsy and cricut, however, you could also create this pencil topper using scissors and a hole puncher. Due to technical difficulties, my gypsy file cannot be uploaded at this time. Check back periodically to see if I have resolved the problem:)
Supplies:
Cricut Expression
Easter 2010 Cartridge
George and Basic Shapes Cartridge
Gypsy
Happy Easter Printout (download HERE)
Two coordinating colors/patterns of cardstock
Glue runner
Zots glue dots
Pencils
Embellishments
Directions:
1. Turn your Cricut on and insert George and Basic Shapes Cartridge.
2. Press the Center Point button on your machine and adjust the height to 2 inches.
3. Load your mat with the Happy Easter Printout and move the blade so it appears to be in the middle of your words. (Note: It usually takes me two or three tries to get it perfect.)
4. Highlight the shift key and the Q/Circle key and then press cut. Repeat this for each circle.
5. Create a file on your Gypsy with the eggs at 4 inches and connect it to your Cricut. Load your paper and press cut.
(Non Gypsy Users: Cut out Eggs using Easter 2010 Cartridge at 4 inches. Punch top and bottom of the egg with a hole puncher.)
6. Remove from mat and set aside or create a pretty design and take a picture like I did :)
 |
| This makes me smile :) |
7. Create a file with scalloped circles on your gypsy. Load your second paper and press cut.
(Non Gypsy Users: Cut scalloped circles at 2 1/2 inches)
8. Remove from mat and set aside. Turn off Cricut and Gypsy.
9. Gather all your supplies including all cut outs and glue.
10. Glue Happy Easter circle in the middle of the flower cut out with any type of glue runner. I try to make it centered and have the indent of the scallop on the very top and bottom (it helps when you are lining them up with the holes)
11. Using Zots glue dots place one or two dots on the back of the flower shape.
12. Attach the flower shape to the center of the egg and let it cure for a bit. Notice how the indents of the scallop line up with the holes :)
13. Slide your pencil gently through the two holes. Voila!
Now comes the fun part! Grab all sorts of embellishments and make the pencil toppers pretty. Here are two other versions I created!
Just a few more photos!
If you have any questions, please feel free to contact me via comment. I am still working on uploading my gypsy files so you can create the pencil toppers without all the hassle of creating the gypsy files but I am having technical difficulties. I will post as soon as the problem is resolved! Stick around because I plan on creating yet another pencil topper for the end of the year and for my new students:)
~Katania


No comments:
Post a Comment