Saturday, September 10, 2011

{Pencil Toppers} School Days

Welcome to a new school year!
Well, school has officially started for me this past Tuesday.  Sadly, even though our summer was extended by a week (two canceled professional development days and three canceled school days) we now have five days added to the end of our school year and it's not even winter yet!  Though on the bright side, I was able to create some pencil toppers for my students.
 
You may remember my tutorial on how to make the pencil toppers that I created for my students around Easter.  If not, please click HERE to get the directions and step by step photos.

I used the same format using my Gypsy and Cricut but instead of Easter eggs I used an apple (duh... makes sense right?).  I also printed and cut out circles that say "Welcome to our class!" I could have used "Welcome to 2nd grade!" but I like the thought of the class as a team/family and felt that "our class" helped direct that message. 

Well here they are, minus the pencils (sadly, I did not have any number two pencils in my house) but you get the idea.  All you have to do is slide the pencil in through the bottom hole and out through the top hole which you can't see because of the flower but it's there, I promise :).  

What do you think?


I absolutely love how the colors just scream fall and the little sheer ribbon (though it was a pain to cut and tie on each one) really added to the overall affect.  Now I can tell you that some of my students don't care about these little craft projects but last year, I couldn't even tell you how many students kept and wanted to take home their pencil topper at the end of the year. 
It just warms my heart.

HAPPY FIRST DAYS OF SCHOOL EVERYONE!

~Katania

P.S. Please excuse my blurry photos, I am in the process of resizing them in order to save space in Picasso however, at this time it is kinda trial and error.  If you have any tips or tricks, I would love it if you sent me a comment! Thanks!

Thursday, September 8, 2011

{Photos} Hurricane Irene

Hurricane Irene hits Connecticut!
Thankfully my family survived the wrath of Irene without much damage and with power!  However, many of my friends and family members who live closer to the shoreline experienced a week without any power which includes water since many people have wells rather than city water.  I was able to take some pictures during the storm (after it slowed down a little) of my backyard and the tree across the street.  I was in complete awe at the force of the winds and how the two trees near our shed bent and swayed.  Many of the photos are blurry because of the rain but you get the idea.


 Notice how the tree is bending in the wind and the branches are almost touching the ground in some areas.
This tree is across the street from us.  Our neighbor even lost some shingles on his roof. 

After the storm I went outside to survey the damage!
 This is one of the trees on the side of our house that fell during the storm.  Thankfully it was pretty dead and only pulled the gutter out a little from the house.  Fixing the gutter is the only thing we had to fix on our house.


 Though you can't see it here, the large tree next to the shed had a ton of very large branches break and fall.  The tree behind it also had two large branches (think about 10 inches in diameter) fall but get caught up in vines and other branches.


There was a ton of cleanup and picking up of sticks to do this last week.  Thankfully, the first day of school was postponed to Tuesday, Sept. 6th (rather than Aug. 31st) so we were able to get most of the work done.  Sadly, many of my vegetable plants were literally windblown and no longer are able to produce anything.  We still have some tomatoes though and I am enjoying them everyday.  Stay tuned for some yummy recipes coming later this week!

~Katania

Monday, August 29, 2011

MIckey and Friends Cupcake Toppers

I received an order for 20 Mickey Mouse and Friends Cupcake Toppers for a little girls second birthday.  I was excited to make these because it was the first time I used the Mickey and Friends Cartridge.  I am definitely pleased with the results even though the characters are very tedious and involve very small pieces.
Here they are!

Yes, Goofy is missing because the person that ordered these only wanted five characters and opted to omit Goofy.

She also wanted some Mickey and Minnie heads with the number two on them.  The number two is from the Mini Monograms cartridge which I am totally in love with again!


If I can get an actual picture of the toppers in cupcakes I will post it as well though it won't be until late September because that's when the party is! 

Also, if you are interested in Mickey Cupcake Toppers or other Disney Characters please email me at ktdesigns-katania@hotmail.com for more information and pricing.  I would love to make something custom for you!

~Katania

Saturday, August 27, 2011

Shout out for Help/FYI

Well it's the calm before the storm here in CT and I am unsure as to how Hurricane Irene will affect us.  That being said, I am unsure if we will have power and access to the Internet.  If that is the case, I might be MIA for a little while but rest assured I will be back. 

Also, my usual posting schedule will probably change as well since I head back to school this coming week.  However, I hope to still post at least once a week to three times a week so I can share with you all my crafty fun.  Don't worry about my summer to do list because it's still summer even though schools are in session.  Let's see if I can complete the remaining items on my list!

Lastly, I need some help in the blogging department.  I created this blog in March of this year and have already used up the free space on Picasso Web Albums.  I don't mind buying more space but it might get a bit pricey considering it only took about 4 months to use up what I had.  Am I doing something wrong?  Are my files too big?  How do I change the size of my photos?  I appreciate any help you might be able to share with me.

~Katania

Friday, August 26, 2011

Tip of the Week #1

I have decided to create a new topic for my blog which will not only help me in my everyday craft troubles but will help you as well.  I will be on the look out for tips specifically related to crafts to include in my Tip of the Week Series.  What better way to start a new series off than to share a tip I stumbled upon just the other day.

Welcome to
TIP OF THE WEEK #1


Okay, so I know you are thinking, "she's just a bit crazy with her ice cube tray" but hear me out.  I kinda stumbled on this tip by accident because I was looking for small bowls to hold all those tiny pieces I cut out using my Cricut.  Normally, it really isn't a problems for me to keep everything organized but when you are cutting out 40+ shapes for an order of invitations, you need something to help out especially with those smaller pieces.  Well while looking in my cabinets I saw the ice cube tray and though it might just work.  Well, VOILA, it was perfect!  Each little ice cube section worked perfectly for the cut layers of the butterflies I was making.  Also I didn't get mixed up on which cut out was from what side of the butterfly because there is a difference (thanks so much Provo Craft!)  I really can't believe I didn't think of this sooner.  Sadly, I am sure my husband will want the ice cube tray back but until then it will be among my scrapbook things!  Here she is again, my very own little helper!


Do you have a tip that helps you in your crafty life? 

~Katania

Sunday, August 21, 2011

Peach Freezer Jelly

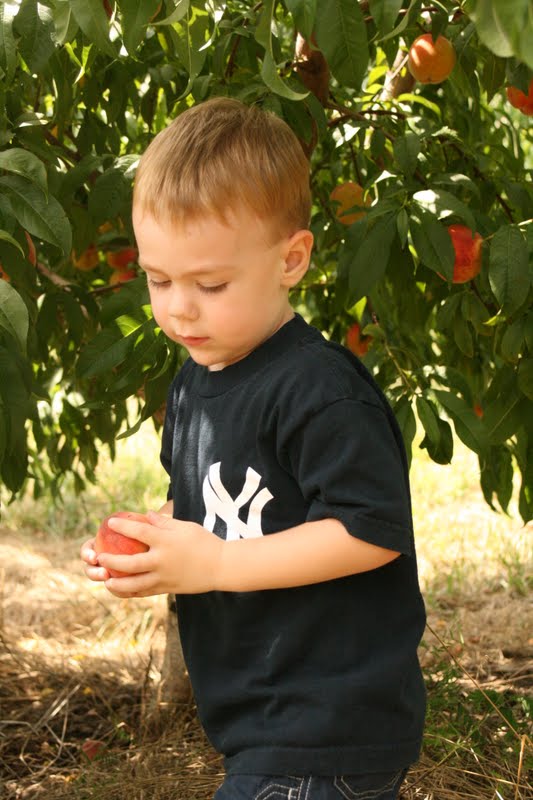
I decided I would make some jelly for our family since my son is absolutely obsessed with pb&j and peaches.  So we went peach picking and brought home two huge bags of delicious peaches.

Here's my little helper picking some peaches!


I also picked up Ball Jelly Jars that were freezer safe.  I searched online and came across this recipe from Bunkycooks and figured I would give it a try.  By the way, aren't her pictures gorgeous.  YUM!  Thankfully my Stop and Shop actually carries all the jars and pectin needed to make jelly so I was able to pick up the Ball Instant Fruit Pectin.  This is much different than regular pectin so make sure you get the correct one.  I liked this recipe because it calls for much less sugar than other recipes and because it's a freezer jam it's so easy (no canning) and tastes so fresh.
I have to say that for my first attempt at making jelly,
it was a huge success!

Just look at that jelly, YUM!


As you can tell in the picture, I left my peaches a little bit chunkier just because I like it that way but you can puree yours if you prefer.  I also gave one jar to my parents and they absolutely loved it!

I can't wait to try strawberry and raspberry freezer jams! YUM!

~Katania

Friday, August 19, 2011

Necklaces with Flower Cabochons


I addition to the 20 rings I made using some fabulous flower cabochons (click HERE and HERE to check them out), I also made two necklaces with much larger flowers.  The first one I made I used this gorgeous garnet rose which instantly reminded me of romance and Twilight (yes... sadly it's true I am a HUGE Twilight fan).  I attached a bail to the back of the flower and then added a black cord and silver clasp.

Here she is in all her glory!
 

You can't even deny it!  It is the epitome of all things romantic.

The second necklace I made I used a bright blue carnation and once again attached a bail to the back.  This time I used a ball chain necklace.  I really think it gives it a summery and beachy look.  I was actually excited to wear this the other day with a gray ruched tee and my favorite capris.  It worked perfectly together.


What do you think?

~Katania